The following guide provides you with a solution for fixing the dreaded “no Internet secured” notification that signals Wifi connectivity issues on machines running Windows.
I bought a Microsoft Surface Pro 4 device back then when it first came out, and like it a lot. It is the device that I use mostly when I’m traveling as it offers all I require in a compact package.
For the past year or so, I noticed a strange wireless Internet connectivity issue regularly when connecting the device using WiFi. Connections to the WiFi hotspot work, but Internet did not at times.
The WiFi that the Surface Pro 4 is connected to at the time that this is happening would always display “no Internet secured” indicating that Internet access was not available. This happened often after turning the Surface on, but could happen also while the device was already running.
A reconnect helped sometimes, but not all the time. I never really had the time to look into this though up until now.
Please note that the fix described below solved the issue for my device. It may help you as well, but since there are probably myriads of issues that may cause wireless Internet connectivity issues, it may not.
Fix “no Internet secured” Wifi issues
It appears that the no Internet issue that I experienced when connecting the Surface Pro 4 device to a wireless network was caused by an IPv6 conflict. I cannot really say what is causing it, only that the following fix repaired the issue on my end.
Here is what I did to fix it:
Step 1:open network and sharing center

Right-click on the network icon in the Windows system tray, and select Open Network and Sharing Center from the context menu that opens up. Note: the icon may not be displayed all the time. Click on the arrow icon in the system tray area then to display it.
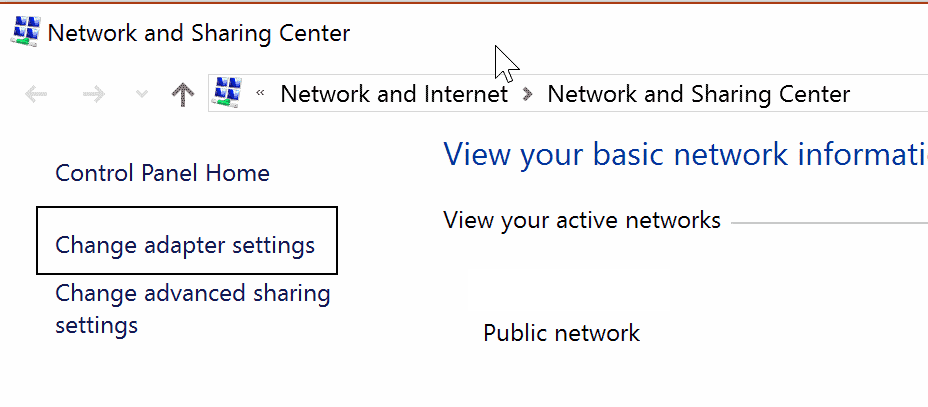
Step 2: Change Adapter Settings

Select the change adapter settings option when the Network and Sharing Center window opens. You find it on the left side there.
Step 3: Open the properties of the network adapter

Locate the network adapter that you are using at this point in time. It should highlight that it is a wireless adapter.
Step 4: Disable IPv6

Locate the Internet Protocol Version 6 (TCP/IPv6) on the list of items that opens, and uncheck it to disable IPv6. Click on ok, and restart the computer afterwards.
Closing Words
This resolved the connectivity issue on my end. I cannot guarantee that it will work in all situations, but it is definitely something that you may want to try out as the “no Internet secured” issue is quite troublesome.
If the fix does not work on your device, you could try and delete the network adapter completely so that Windows adds it anew on the next start of the system.
You may also want to try the following Internet connectivity troubleshooting tools which we reviewed in the past:
- Complete Internet Repair review
- Netchecker: repair Internet connection issues
- Repair Internet connection issues with Connection Fixer
Now you: Did you ever run into Internet connection issues?