![]()
Ed Bott
for The Ed Bott Report
| October 18, 2021
| Topic: Windows 11
Windows 11: Everything you need to know
Watch Now
How do you test Windows 11 for compatibility with essential apps without putting your work at risk? Simple: Use the built-in Hyper-V platform on your Windows 10 PC to create a virtual machine and install Windows 11. You can run your existing apps and services in that virtual machine without risking the integrity or stability of your “real” PC.
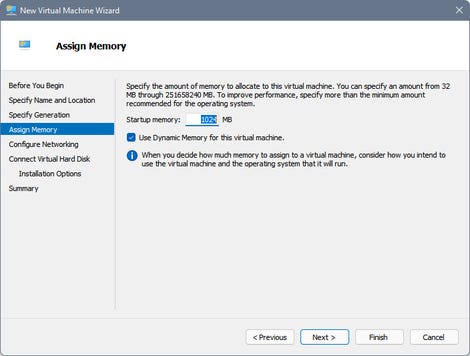
The default Dynamic Memory option keeps RAM usage to a minimum, expanding as needed
Configure Networking – Choose Default Switch from the drop-down menu.Connect Virtual Hard Disk – Use the default option, Create A Virtual Hard Disk. You can safely leave its size at 127 GB. Hyper-V creates a dynamically expanding virtual hard disk that uses only a fraction of that space.
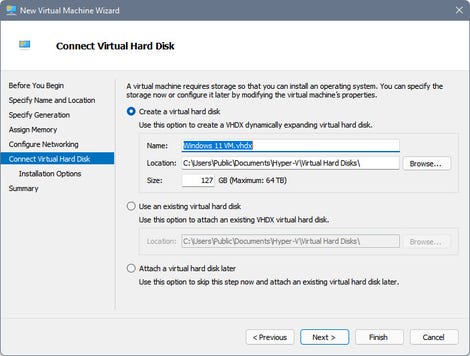
These default settings create a dynamically expanding 127 GB virtual hard disk that uses only a small amount of actual disk space
Installation Options – Choose the second option, as shown here; then click Browse and choose the Windows 11 ISO from your Downloads folder.
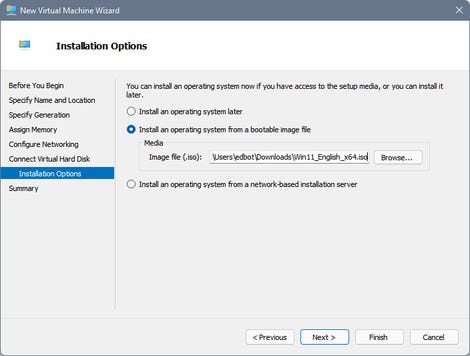
Specify the location of the Windows 11 installation file to automatically mount your ISO as a virtual DVD drive
4. Click Finish to create the virtual machine, but don’t connect to the VM just yet. Instead, from Hyper-V Manager, right-click the VM you just created, click Settings, and make the following tweaks to avoid having Windows 11 complain later that your VM doesn’t meet its hardware requirements:
In the Hardware pane on the left, select Security. Then, in the pane on the right, click Enable Trusted Platform Module.
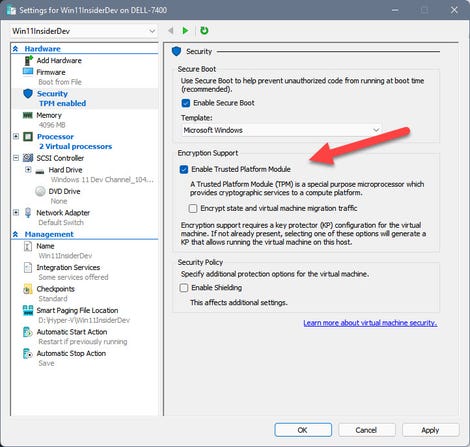
Select this checkbox to enable the virtual TPM required for a Windows 11 VM.
Select Processor in the Hardware pane and change the setting for Number Of Virtual Processors to 2.Click OK to save your changes.
5. Double-click the VM and click Start to connect to the virtual machine. Be prepared to click in the Virtual Machine Connection and tap any key to boot from the virtual DVD you created using your Windows 11 ISO. That should open the Windows Setup screen shown here.
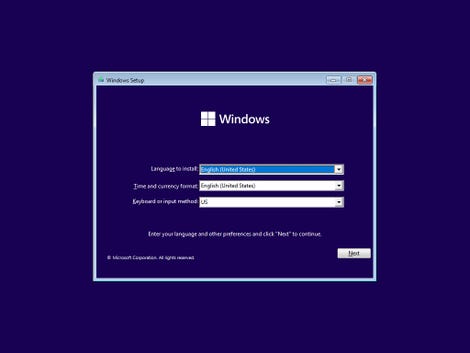
If everything’s configured correctly, you can start here to do a clean install of Windows 11 on your new VM
6. Follow the prompts to complete setup.
If you configured Windows to use a Microsoft account, you’ll need to do one last tweak before you can sign on in an enhanced session and use your VM in full-screen mode: Go to Settings > Accounts > Sign-in Options and turn the Require Windows Hello Sign-in For Microsoft Accounts switch to the Off position.
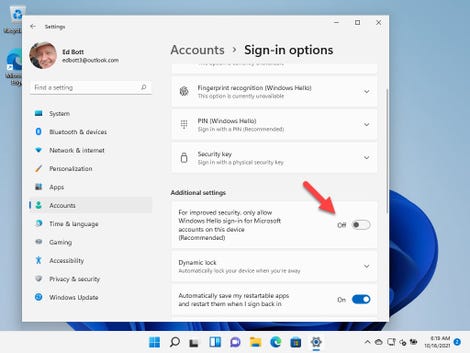
You’ll need to turn this setting off to sign in to a Windows 11 VM using a Microsoft account in an enhanced session
If you forget to make this adjustment and try to sign in using an enhanced session, you’ll find yourself stuck at the Windows sign-in screen with only the background image visible. The fix is simple: From the Virtual Machine Connection window, choose View, then click Enhanced Session to clear the checkbox and switch to a basic session.
Sign in and make the change to your account settings and then use the View menu to switch back to an enhanced session.
Windows 11
How to get Windows 11 now
Microsoft’s biggest minor upgrade ever is all about new hardware
Upgrading? Five questions to ask first
Half of enterprise workstations don’t meet the new system requirements
Can your PC upgrade to Windows 11? Check this app
Windows 11 is causing ‘reduced performance’ for some AMD chips
Related Topics:
Enterprise Software
Microsoft
Windows
Windows 10
![]()
Ed Bott
for The Ed Bott Report
| October 18, 2021
| Topic: Windows 11